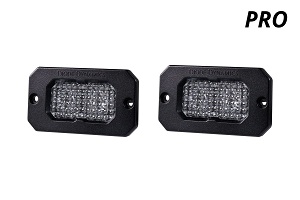
So you’re looking for a solution to replace (and enhance) the functionality of the fog lights in your Subaru Crosstrek. You’re tired of how quickly incandescent lights burn out, or you simply aren’t impressed with their focus or performance. You’ve settled on LEDs because they last longer, are tougher, more reliable, and draw less power.

You’ve also made the wise choice to go with the SS3 Light Pods that you can find at Diode Dynamics. These LEDs don’t just offer the above mentioned benefits; they’re also brighter, better focused, and plug and play solutions as well. If this sort of thing matters to you, they’re also available in a true, rich yellow that is very unlike the “greenish” glow of many other so-called “yellow” LED fog lights. Now you just need to install them.
First, you’ll need a Type A Fog Bracket which will enable you to mount the pods in the correct location on the vehicle. Take the two nuts out of the bag of provided hardware and place them in the back of the work light housing. Place the Type A Bracket over the back of the housing with the DD logo at the top. There will be two supplied screws and washers; thread these through the Type A Bracket into the pod housing.
There are two clips holding on a piece of cowling at the back of the wheel wells on both the passengers’ and drivers’ sides of the vehicle. The top clip is a blind rivet; this can be disengaged by pushing inward with a small screwdriver or other punch tool. Then, you’ll need a prying tool to pull the lip away from the cowling. There is also a push clip on the inside of the wheel well; using a flathead screwdriver or pry tool, disengage the push clip, at which point it can be pulled out the rest of the way. There are also two push clips along the bottom of the bumper that must be removed in the same fashion in order to access the fog light housing.
Pull the bumper cover away from the fender, exposing the housing. There is one more push clip securing the housing which must be removed. Then, using a 10mm wrench, loosen the bolt that secures the fog lamp and disconnect the connector.
Next, take the new SS3 Fog Light assembly and place it in the receptacle left by the old lamp in order to check with fitment. It should be fairly easy to secure an adequate, satisfactory fit. Tighten the screws that you placed in the assembly earlier and place the bracket into position behind the bumper. Replace the 10mm bolt and tighten it to secure the new assembly. Replace the original push clip that helps to retain the housing.
Next, take the connector that is supplied with the kit and plug it into the factory wiring harness before plugging it into the new fog light pods. With the supplied harness attached to the factory harness, you can plug it into the new light. Check your lights by turning them on; if the light failed to come on, it may be because your car’s sockets are polarized. To remedy this issue, simply disconnect the factory harness from the supplied connector, rotate the supplied connector 180 degrees and plug it back in. This time, your new LED light pods should come on.
To finish everything up, reverse the process you followed previously, replacing all of the clips and the rivet in the original locations from which you removed them. If you’re looking for more information on installation, consult Diode Dynamics’ YouTube channel where you’ll find how-to installation videos addressing similar needs; you can find a video on How to Install SS3 Type A Fog Light Kit for 2016-2019 Subaru Crosstrek at the link above.
Alternatively, visit DiodeDynamics.com or reach out to them for more information. You can get in touch with them at [email protected] or at 314-205-3033.
For more information about Automotive Led Lights and Led Light Bar Please visit : Diode Dynamics.


